I am so honoured to be part of such a wonderfully generous blog community, surrounded by rather very talented people, who are constantly sharing their creations and giving tutorials on how to make so many wonderful items, without asking for payment of any kind.
I have used many patterns, cooked many delish meals, and all I have done is credit them when I mention what I have made through my own little blog, steering the few followers that I have onto these other hugely talented people, that just make me go 'oohhhhh' and 'ahhhhhhh' .
I would like to say thank you to all of them who inspire me to create.
In return, here is a little thank you tutorial share from me - it's not new, it's not all that exciting, but it's fun to make and looks pretty in a gift parcel. The bonus part is that every teacher I know uses them, has them on their desk, and next to the phone, puts them on books, flaps them out of their diary/calendar. It's not invented by me at all. I am not sure where they stemmed from, but I do know they are rather quite popular and I have been making and giving them as teacher gifts I think the last two years now. This year will be no exception, again I am making these little goodies to go into their gift parcels as a thank you for being so dedicated in their very important role towards the education of our little ones.

I call them The Sticky Note Coat.

Firstly I am guessing most 'general' sticky notes are the same size (7.6cms x 7.6cms), assuming so, you need to cut your main piece of card 8cms x 18cms. Be sure to check your patterns are running the direction you want them to finish in.

Then cut yourself a contrasting insert piece of card 7cms x 7cms. If you have a rounded corner punch, you can tidy the edges or do this by hand. Alternatively, you can leave the corners square.

Cut yourself 2 x pieces of satin ribbon to 19cms long. If you are using wider ribbon, then cut it longer for a more luxurious bow. (Organza ribbon looks so pretty on these little coats, all gauzy and romantic with a big thick bow.)

Measuring your main piece of card, mark with pencil at 8.5cms and 9.5cms.

Score and fold along these 2 lines, then erase the pencil markings.

Your 'coat' now looks like this.
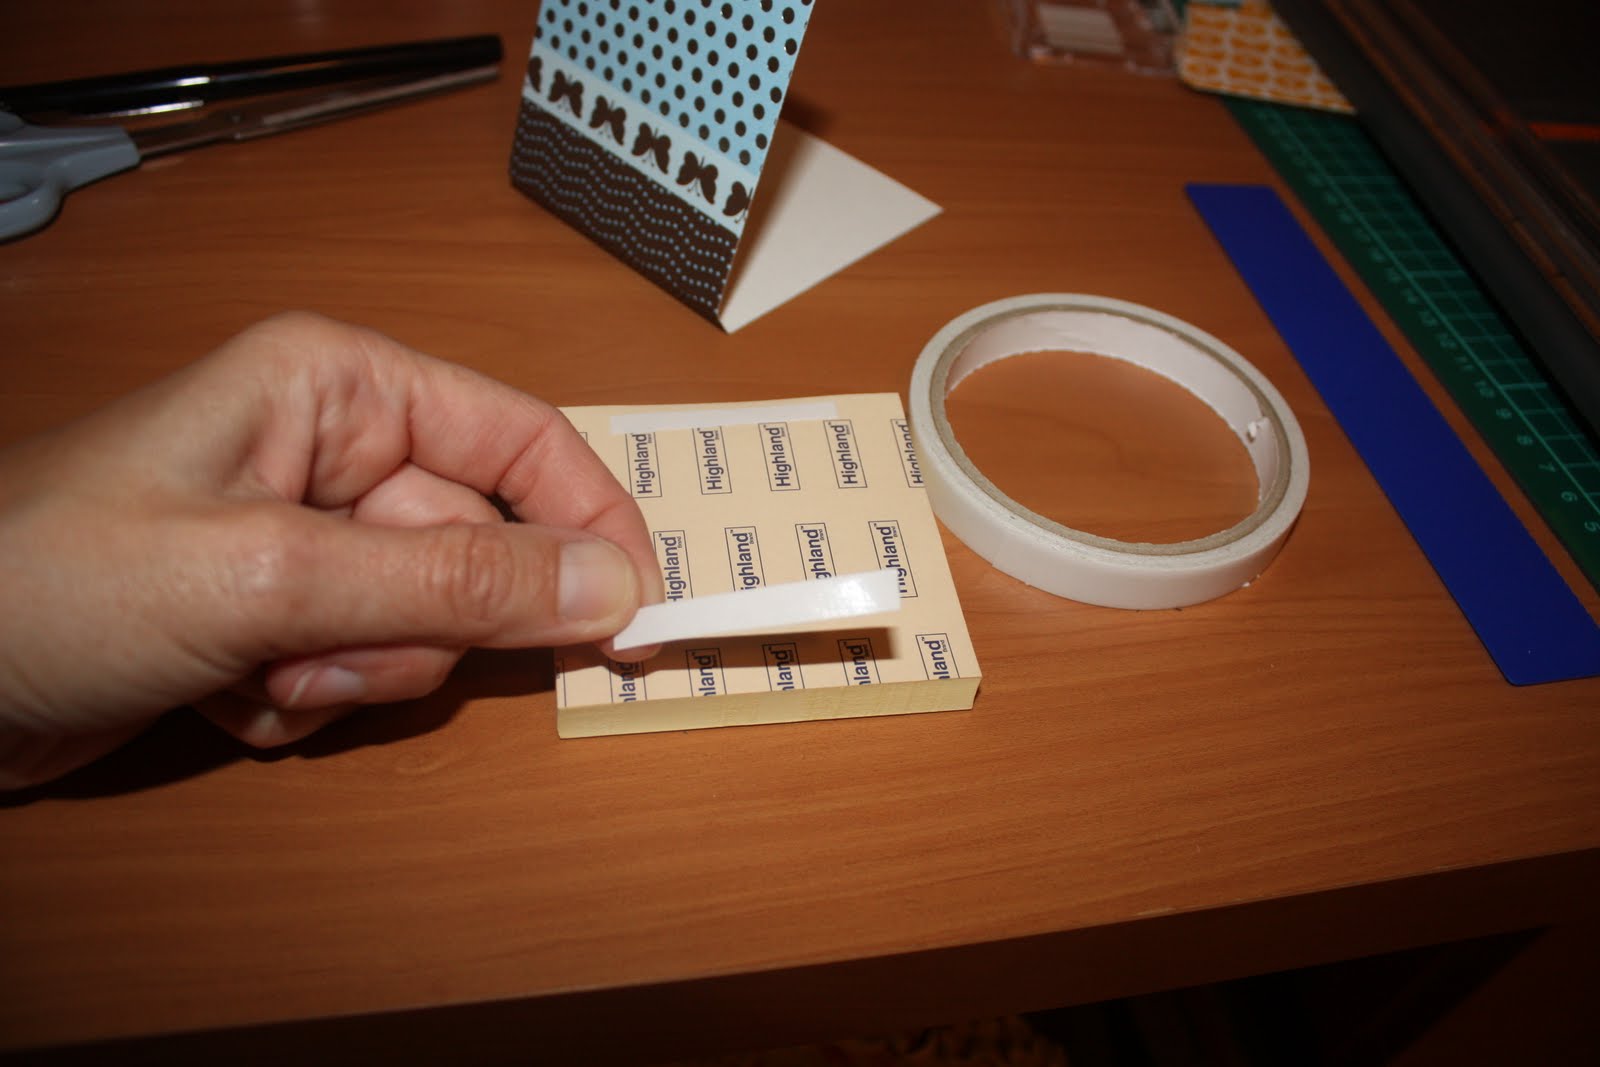
Double sided tape to the top and bottom of your sticky note pad.

Attach one piece of satin ribbon to the BOTTOM of your sticky note pad.

Adhere sticky note pad to the inside back of the 'coat'.

Attach double sided tape to the top and bottom of your insert piece.

Attach the other piece of satin ribbon to the TOP of your insert piece, making sure you have it the correct way around for patterned papers.

Adhere this to the inside top of the 'coat'.

Your sticky note coat is now complete.

Tie a bow in your satin ribbon, and taa-daa, your sticky note pad is all dressed up.

You can do anything you like to these little covers, fabrics, buttons, stamping, glitter, bling, doilies, lace, whatever takes your fancy.

You can even attach a cutie little gel pen, all you need to do is cut your main card to measure 12cms x 21 cms long. Cut your inserts to cover the ribbon ends to fit.

The little pen holder is made from sturdy cardstock, and depending on the pen, you will need to cut about 4cms x 2cms. Fold in the two ends and arch the middle as in the photo. Using double sided tape adhere the flattened turned in ends to the inside base.
You can even stick a magnet on the back for the fridge.
If you make one, I would love to see it, just let me know and post it to your blog so we can check it out too.
Have a lovely week at your place.
6 comments:
These look so cute, thanks for the tutorial.xx
Joyce this little sticky notebook covers look super cute and definitely a great pressie for a teacher. Thank you for sharing.:)
oh Joyce these look delightful....I am really slow when it comes to following these tutorials BUT I am going to 'play around' with this one until I get the hang of it!! Thankyou, TK xx
Thanks Girls, the teachers just love them, they do look rather cute on the desk too me thinks. If I was a teacher, I would have little things like this on my desk along with a little vase of gardenia or daisies and a decorated tin full of coloured pencils.
Tiffany, I would love to see what you come up with. Please let me know if my instructions are too *ick* and I will try to correct them. Have fun and please show me what you make, I would love to see.
How cute is that! Love it! Thank you so much for the tutorial!
I know what you mean. I too have tried out so many patterns and recipes! It's a lovely bloggy community, isn't it?
simple and cute. i love projects like this. thanks for sharing your process :)
Post a Comment