Tuesday, February 26, 2013

Free Sewing Patterns and Stuff


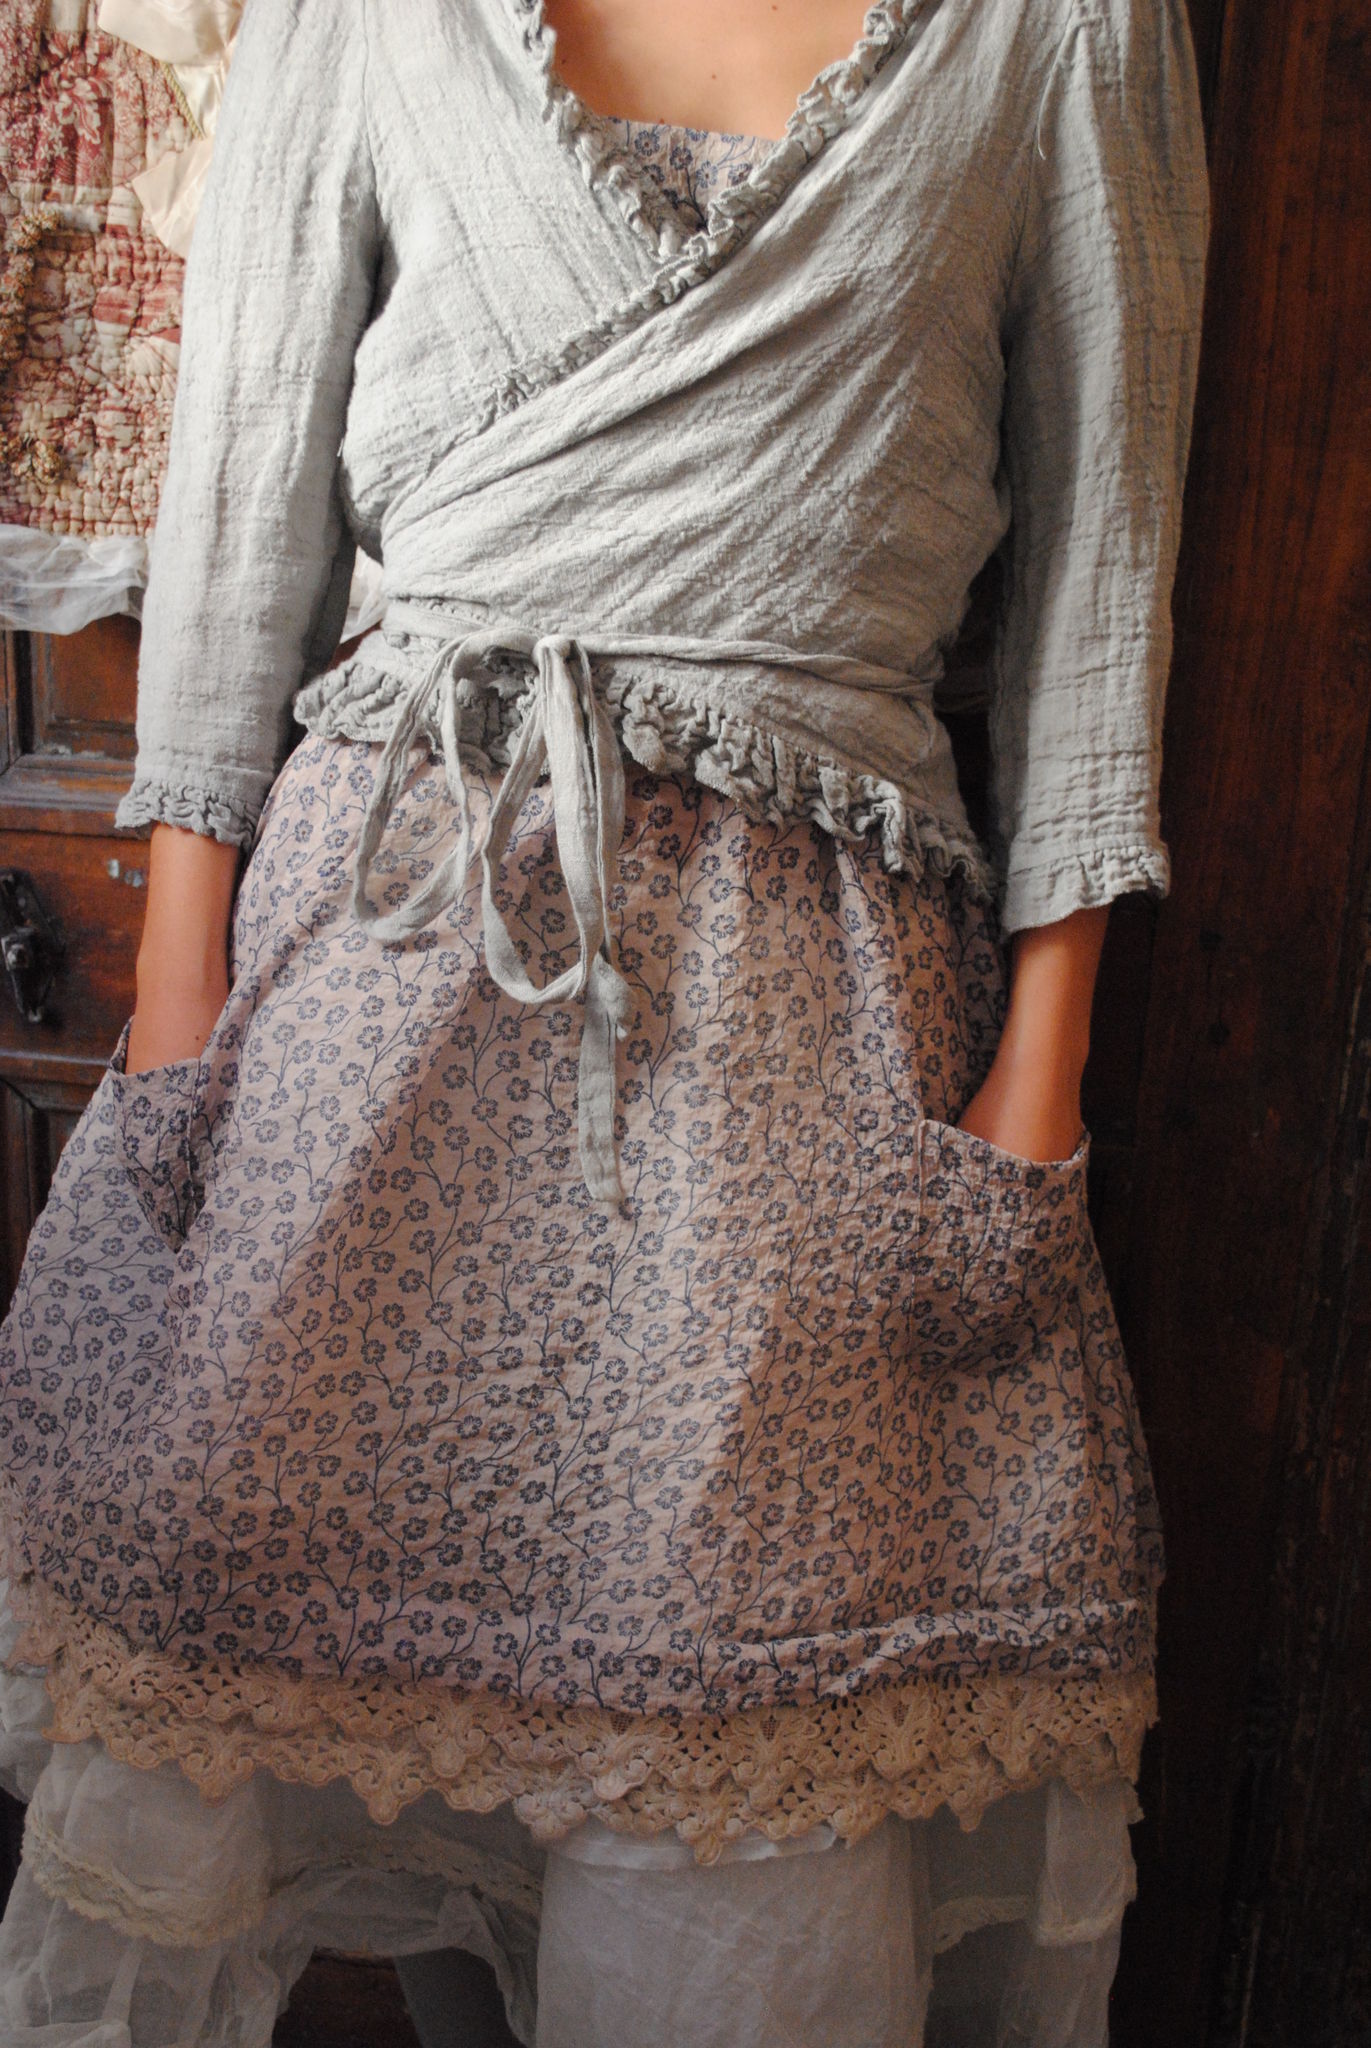
I am not sure what I am looking for from my wardrobe right now, but I know I want layers.

I want soft, whispering layers, that drape gently down my body.

I want mix and match layers.

I want bits of lace trim.

I want to wear my leggings with them.

I want to wear my boots.

I think I am yearning for Autumn.

I think I am finished with Summer.

My skin is calling out for the cooler breeze, the gentle sun.
My eyes want to see colours change and brown in the garden.
My nose wants to smell freesia.
My tummy is awaiting oranges and pumpkin soup.
My ears want to hear the roar of the ocean as it kisses the shore.

Here are some ohhhhh and ahhhhhh's I have perused lately.

I do like what I see, and thought I would share them with you.


Click on the link above to take you to the page to download the pretty patterns shown here.
I love the under-dress and the tank-dress.
Perfect starters to a wardrobe of layering.  
I can see crochet trim and lace hemming on these.


Specks & Keepings have these beautiful outfits for sale.
I love these multi-seasonal treasures.


Then the rest of the photos below I have found on Pinterest.  
What a brilliant place to gather ideas.


lots of layers with cute apron

Love the boots and the lace.


Sunday, February 24, 2013

Blanket Stitch

I have been wanting to share one of my favourite stitches for a while now.
Super super easy peasy, with chocolate dipped strawberries on top blanket stitch.

I should probably start by warning you that I am left-handed.  
I do knit and crochet as right-handed, but I am not sure who I am when I sew.  


Start with your piggy-back stitch to secure your thread behind the scenes, 
and pull through to the front of your work, ready to commence blanket stitch.  

Push your needle into your fabric, and out the back.
Make sure your length of thread is BEHIND your needle, as shown above.


Pull your needle and thread through all the way. 


Ta-daaaa - your first blanket stitch.
See how the thread has been 'caught' at the back of your stitch?
Awesome!


Ok - so keep going - get your needle, pushing into the fabric and out the back, again,
make sure the tail of the thread of where you have just come from, is behind your needle.


Drag through gently to create the next stitch.


You can put the stitches as close together or as far apart as you wish.
You can also alter the length of your stitches as well, depending on the finish you are after.


Push the needle through the fabric, . . . . . . .

making sure the thread is behind the needle, . . . . . . . 


and gently pull through . . . . . . . . 

making blanket stitch.

YaY!

* * * * * * * * * * * * * * * * * * * * * * * * 

So ok, sometimes we do a little hiccup and don't have the 
thread behind the needle when we pull it through the fabric.  
Not a problem, here is what it looks like, and what we can do to make it all better again.  
It really is quite simple.


You can see the thread is not behind the needle coming through the back where my finger is.
If you notice this at the time, all you have to do is pop the thread behind the needle and keep going.


But if you don't notice it until you have pulled the thread through, 
you can still fix it.


Get your needle. . . . . . .


put it through the loop as you can see here. . . . . . . 

and pull your thread through gently. . . . . . . 


to complete the blanket stitch.

You are awesome!

Now go forth, be free, and blanket stitch!

xx


Sunday, February 17, 2013

Wet Felting

I have never done this before.  
I have always wanted to learn.
Here was my chance to give it a go.
Kindy needed some ocean themed goodies in their classroom.
I like sea horses.

I gently layered the fleece vertical, then horizontal, then vertical again.

Using my beautiful seahorse that sits in our bathroom as a guide. . . . . . 

I ever so gently shaped my fleece seahorse. . . . . . . .

Added detail, and seaweed. . . . . . 

and felt pretty clever.

Filling a spritz bottle with almost hot, soapy water, and saturate the fleece.

I covered the fleece with a piece of polyester type curtain.  
The fabric is rough and apparently will assist with the fleece bonding.
Roll up the bamboo matting and I tied the middle with string to keep it together while vigorously rolling back and forth, back and forth to agitate the fleeces to bond.  I am not sure of correct terminology here, it's my first time and I have not read any books on felting, I just got a verbal instruction from the class teacher on how to felt. 


Checking on progress, I unroll the mat to find things are starting to happen.  I was able to gently reshape with my fingernail bits of the seahorse and define the seaweed shape more.  Rolling bamboo up once again, and rolling back and forth, back and forth to felt.


Another look at progress and shrinking is happening, which apparently it should.


Getting closer to not being able to lift and separate the fleece.

The bamboo mat was worse for wear after my vigorous handiwork.  I owe kindy a new bamboo mat this week.  Each time I opened the roll, I gently stretched the fleece back out again, it was shrinking fast.  Next time I will keep this in mind with the initial design.

Here is a closeup of the seahorse tail.  The colours did not quite bond like I had wanted, but it did turn out alot better than I thought for my first ever wet felting attempt.

Here is my beautiful seahorse, all dried and ready to be delivered to kindy tomorrow.  
Gosh I hope they like it.  
Perfect to decorate with little shells and treasures, for a lovely underwater story.

Thanks for stopping by Joycie's place today.
Tell me, what have you made at your place lately?

xx

Sunday, February 10, 2013

I Miss You, I Miss You All.


It's been too long my friends.  

I miss you.

xx

Saturday, September 8, 2012

Seasons Change.


Dear Friends,
Joyce is at a cross roads.
There is a change of season.
Fresh challenges ahead.
If I don't try them out, I will never, never know.
Joyce still does live here.
Joyce still loves to blog.
So I am sort of moving with the flow.
Floating on the breeze.
Letting it lead me.
Checking out the view from another angle.
I have a new blog.
It's not quite so personal.
More to do with my making-ness journey.
Not everyone is on facebook.
Not everyone can see my creations.
I am not ready for a website - yet.
I have so much to learn.
But not in a hurry to learn it.
Just letting the process of learning land upon me.
As everything has a season.
As everything has a reason.
I float on the breeze.
Let it take me where it will.

Thank you for my introduction to blogging here at Joyce Lives Here.  
Each and everyone of you have inspired me, to blog more, to make more, to share more.
Many new friends have been made here.  I so love that.

I am going to attach your blogs to my new one and follow you from there.
All you have to do is comment below with your current blog (I have quite a few blogs that I notice have not been updated for the longest time, and so not sure if they still are being used).  When you comment below, I will add your blog to my new blog so's I can follow you.  

My new blog is Just Joyce.  It's a little bit of handmade in your everyday.
Thank you and bless.  
xx

Friday, August 31, 2012

Day 31

Day 31

Farewell Winter.

Thank you for your beauty.


It's also my Take a Moment Friday.
I don't have anything to quote today, 
so just enjoy the moment and take a little breath.

Have a wonderful weekend at your place.

xx


Thursday, August 30, 2012

Day 30


Day 30

Memories.

Favourites.

Colour.

Love it.

xx